Enabling Cypress extension
This is an experimental feature.
The enableCypressExtension experimental feature flag allows you to leverage Cypress (opens in a new tab) extensions within your FastStore project, enabling you to seamlessly run custom Cypress tests.
Cypress extensions enhance the testing capabilities of your Faststore project by enabling the incorporation of custom Cypress tests alongside the native integration tests provided by Faststore.
With enableCypressExtension, you can implement custom integration tests into a dedicated Cypress folder within your storefront project. This integration ensures the smooth execution of both the native tests and the custom ones you create as part of the continuous integration (CI) pipeline.
Learn how to add custom integration tests in the following steps.
Before you begin
-
Please be aware that this feature is experimental and may not be suitable for all use cases.
-
Refer to Cypress documentation (opens in a new tab) for more information on this testing tool.
-
Ensure you are using
@faststore/core2.1.56version or above and@faststore/cliversion2.2.9or above. If you have versions lower than these requirements, update them as follows:- In your storefront project, open the
package.jsonfile. - Navigate to the
@faststore/coreand update it to at least2.1.56. - Navigate to the
@faststore/cliand update it to at least2.2.9. - Run
yarn devto apply these changes.
- In your storefront project, open the
Step 1: Enabling enableCypressExtension
- Open the
faststore.config.jsfile. - Add the
experimentalobject with theenableCypressExtensionas it property. - Set the
enableCypressExtensionvalue totrue:
  },
  experimental: {
      enableCypressExtension: true,
  }
Step 2: Integrating custom Cypress tests into your FastStore project
Like any other project using Cypress, you'll follow standard practices, including setting up standard Cypress folders and configuration files. This allows you to seamlessly add and execute your custom integration tests within your project. For further details on Cypress configuration, refer to the official Cypress configuration (opens in a new tab) guide.
- In the root directory of your storefront project, create a new folder named
cypress. - Add your custom integration tests within the
cypress/integrationfolder. - With the local server running, run
yarn testto open the Cypress app and to check your tests execution. - Open a pull request with the changes you have made.
- Within the pull request, navigate to Checks > Integration Tests and check the Details section.
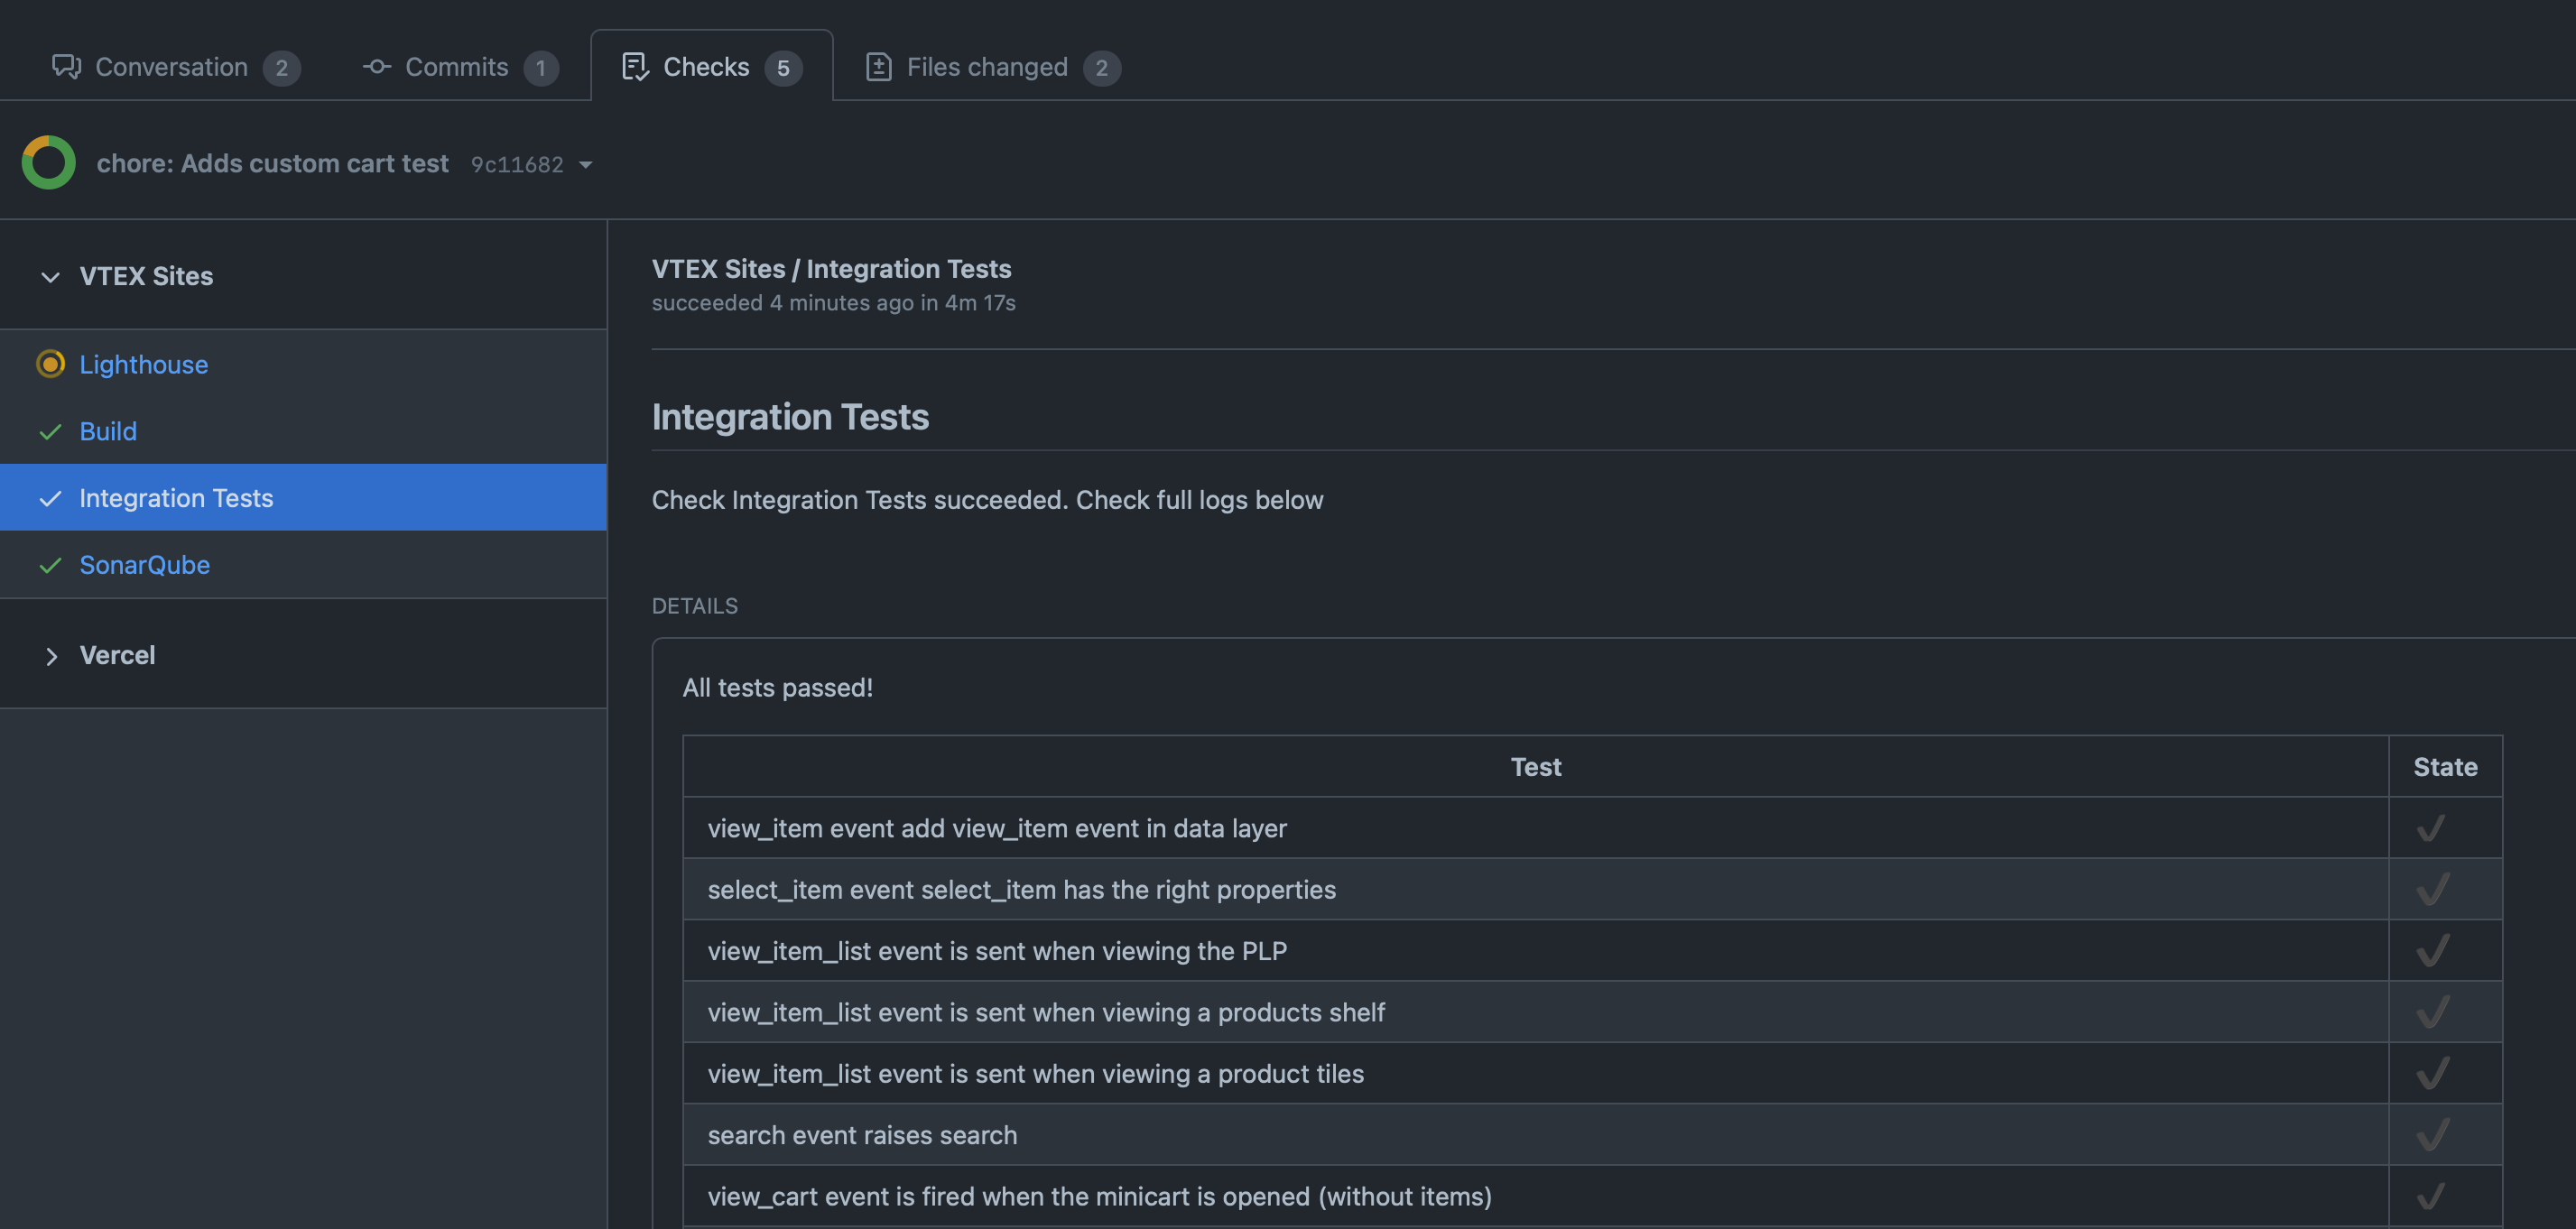
- Review the results to check the execution status of your custom integration tests.
Running only custom Cypress tests in FastStore projects
As storefront projects evolve, changes to component and page code may lead to errors in the default end-to-end tests conducted for all FastStore projects.
In such cases, you can override FastStore's default tests using custom tests with the same name as the original test files. For example:
import { cypress } from '../../faststore.config'

const { pages } = cypress

describe('Custom PLP tests', () => {
  it('visit collection page', () => {
    cy.visit(pages.collection)
    cy.get('[data-testid="product-gallery"]').should('exist').and('be.visible')
  })
})Although exclusive execution of custom tests is possible for projects using Cypress version 12.x, we do not recommend this approach. If possible, keep the default Cypress tests.
Some projects may prefer exclusive execution of its custom Cypress tests. Although it is not our recommendation, for projects using Cypress version 12.x or higher there is the possibility of running the Integration Tests check only for your custom tests.
Follow the steps below to configure your project to only run custom Cypress tests:
Step by step
Step 1 - Setting Cypress version
First, ensure that you use Cypress version 12 by setting the cypressVersion experimental feature flag:
- Open the
faststore.config.jsfile. - Inside the
experimentalobject, add thecypressVersionproperty. - Set the
cypressVersionvalue to12.
  },
  experimental: {
      enableCypressExtension: true,
      cypressVersion: 12,
  }
Step 2 - Updating the Cypress configuration file
Ensure that your Cypress configuration file (cypress.json) matches the latest Cypress configuration file format. To do so, refer to the official Cypress configuration file (opens in a new tab) guide.
Step 3 - Changing the custom Cypress tests directory
Now, change your custom Cypress tests directory from cypress/integration to cypress/e2e:
- In your storefront project, rename the folder from
cypress/integrationtocypress/e2e. - Update your new Cypress configuration file
cypress.config.tsto match the new custom tests foldercypress/e2eby specifying thespecPattern:
import { defineConfig } from 'cypress'

export default defineConfig({
  ...,
  e2e: {
    ...,
    specPattern: 'cypress/e2e/**/*.test.{js,jsx,ts,tsx}',
  },
})- Run
yarn devin the terminal to sync the changes you have made.